IOS 17.2 Released : Find out Everything New

IOS 17.2 Released : Find out Everything New

iOS 17.2 Update Released

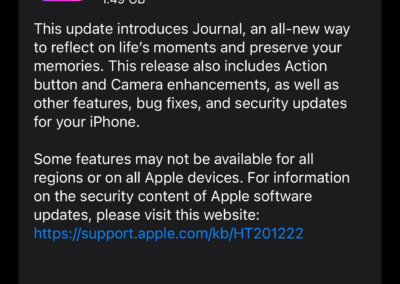
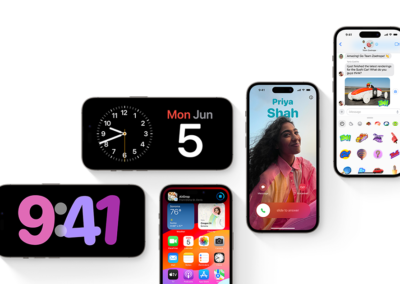
With the release of iOS 17.2 on Tuesday, December 12, 2023, the 17th iteration of the Apple mobile operating system is now in its full glory. The update includes promised noteworthy updates like the inclusion of the Journal app and spatial recording to the iPhone 15 lineup.

Features

The Journal app is part of Apple’s efforts to bolster mental health, combined with the mood-tracking additions to the iOS 17 Health app. This is one of the most notable features of this update as it is a tool specifically designed to enhance self-reflection and gratitude practices among users.

This innovative app comes equipped with journaling prompts that intelligently organize your daily activities, such as outings, photos, and workouts, into meaningful moments for easy journaling. It also features intuitive filters for swiftly locating bookmarked entries or those with attachments, allowing you to effortlessly revisit and ponder over significant life events. To encourage a regular journaling habit, the app provides customizable scheduled notifications, prompting you to write at your preferred times and days. For added privacy, the Journal app offers a locking mechanism via Touch ID or Face ID. Moreover, your journal entries are securely encrypted and synchronized over iCloud, ensuring your reflections are both safe and accessible.

Another notable feature of iOS 17.2 is spatial recording. This feature allows you to capture video on iPhone 15 Pro and iPhone 15 Pro Max so you can relive your memories in three dimensions on Apple Vision Pro. The update also includes improved telephoto camera focusing speed when capturing small faraway objects on the iPhone 15 Pro and iPhone 15 Pro Max.

In addition to these features, iOS 17.2 also includes several improvements to the Messages and Weather apps, a Favorite Songs playlist in Apple Music, security fixes and patches.The complete list of changes are as follows:

Journal
  •   Journal is a new app that lets you write about the small moments and big events in your life so you can practice gratitude and improve your wellbeing
  •   Journaling suggestions make it easy to remember your experiences by intelligently grouping your outings, photos, workouts, and more into moments you can add to your journal
  •   Filters let you quickly find bookmarked entries or show entries with attachments so you can revisit and reflect on key moments i your life
  •   Scheduled notifications help you keep a consistent journaling practice by reminding you to write on the days and time you choose
  •   Option to lock your journal using Touch ID or Face ID
  •   Cloud sync keeps your journal entries safe and encrypted on iCloud
Action Button

• Translate option for the Action button on iPhone 15 Pro and iPhone 15 Pro Max to quickly translate phrases or have a conversation with someone in another language


Camera
  •   Spatial video lets you capture video on iPhone 15 Pro and iPhone 15 Pro Max so you can relive your memories in three dimensions on Apple Vision Pro
  •   Improved Telephoto camera focusing speed when capturing small faraway objects on iPhone 15 Pro and iPhone 15 Pro Max
Messages
  •   Catch-up arrow lets you easily jump to your first unread message in a conversation by tapping the arrow visible in the top-right corner
  •   Add sticker option in the context menu lets you add a sticker directly to a bubble
  •   Memoji updates include the ability to adjust the body shape of any Memoji
  •   Contact Key Verification provides automatic alerts and Contact Verification Codes to help verify people facing extraordinary digital threats are messaging only with the people they intend
Weather
  •   Precipitation amounts help you stay on top of rain and snow conditions for a given day over the next 10 days
  •   New widgets let you choose from next-hour precipitation, daily forecast, sunrise and sunset times, and current conditions such as Air Quality, Feels Like, and wind speed
  •   Wind map snapshot helps you quickly assess wind patterns and access the animated wind map overlay to prepare for forecasted wind conditions for the next 24 hours
  •   Interactive moon calendar lets you easily visualize the phase of the moon on any day for the next month

This update also includes the following improvements and bug fixes:


Siri support for privately accessing and logging Health app data using your voice

AirDrop improvements including expanded contact sharing options and the ability to share boarding passes, movie tickets, and other eligible passes by bringing two iPhones together

Favourite Songs Playlist in Apple Music lets you quickly get back to the songs you mark as favourites

Use Listening History in Apple Music can be disabled in a Focus so music you listen to does not appear in Recently Played or influence your recommendations

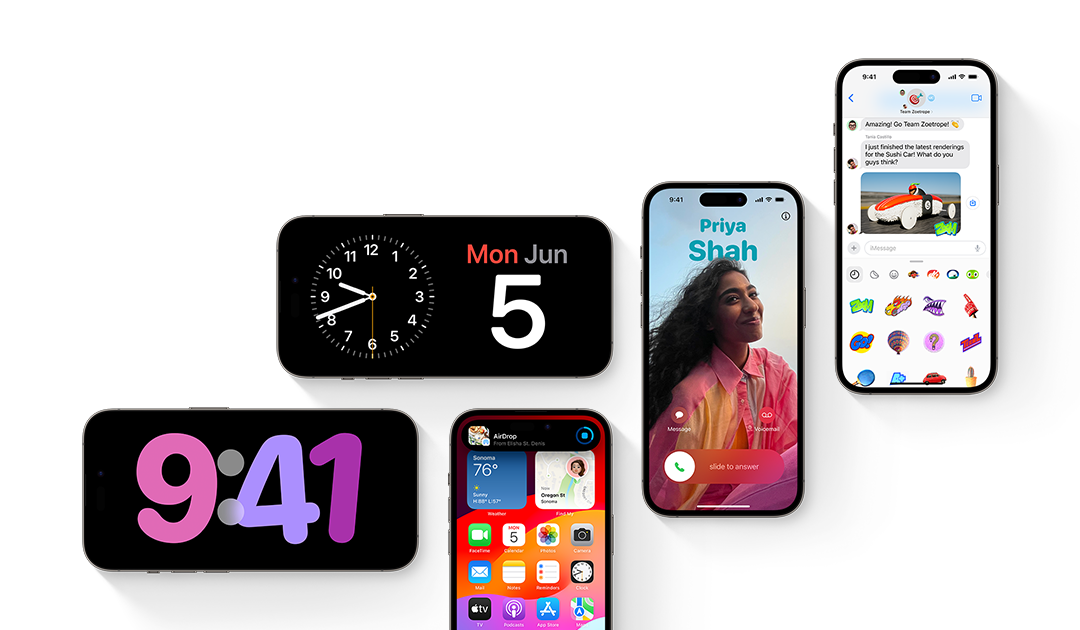
A new Digital Clock Widget lets you quickly catch a glimpse of the time on your Home Screen and while in StandBy

Enhanced AutoFill identifies fields in PDFs and other forms enabling you to populate them with information such as

names and addresses from your contacts

New keyboard layouts provide support for 8 Sámi languages

Sensitive Content Warning for stickers in Messages prevents you from being unexpectedly shown a sticker containing nudity

Qi2 charger support for all iPhone 13 models and iPhone 14 models

Fixes an issue that may prevent wireless charging in certain

Eligibility

Overall, iOS 17.2 is a significant update to Apple’s mobile operating system, and it comes with several noteworthy features and improvements. If you have an iPhone Xs or newer, be sure to download the update and take advantage of all the new features and improvements it has to offer. The update size is 1.49 Gb if you are coming from a 17.1.2 on a iPhone 15 pro lineup. Here is the complete list of devices that are eligible for the update:

iPhone SE (2nd generation)

iPhone SE (3rd generation)

iPhone XR

iPhone XS

iPhone XS Max

iPhone 11

iPhone 11 Pro

iPhone 11 Pro Max

iPhone 12 mini

iPhone 12

iPhone 12 Pro

iPhone 12 Pro Max

iPhone 13 mini

iPhone 13

iPhone 13 Pro

iPhone 13 Pro Max

iPhone 14

iPhone 14 Plus

iPhone 14 Pro

iPhone 14 Pro Max

iPhone 15

iPhone 15 Plus

iPhone 15 Pro

iPhone 15 Pro Max

However, it must be noted that all the latest features that iOS 17.2 has to offer might not be available to all these models.

How to update

Installing iOS 17.2 on your compatible iPhone is a straightforward process. Here’s how you can do it:

  1. Backup Your iPhone: Before installing any major update, it’s a good practice to back up your device. You can do this via iCloud or by connecting your iPhone to a computer and using iTunes (or Finder if you’re on macOS Catalina or later).
  2. Ensure Adequate Battery Life: Make sure your iPhone is either fully charged or connected to a power source during the update process. The update should not be done on low battery to avoid any interruptions.
  3. Connect to Wi-Fi: Since iOS updates are typically large files, it’s advisable to connect your iPhone to a Wi-Fi network to avoid using a lot of mobile data.
  4. Update iOS:
    • Go to the ‘Settings’ app on your iPhone.
    • Tap on ‘General’.
    • Select ‘Software Update’.
    • If iOS 17.2 is available for your device, you will see it listed here. Tap ‘Download and Install’.
    • Enter your passcode if prompted.
  5. Install the Update: After the download is complete, you can tap ‘Install’ to update immediately, or choose ‘Later’ and select ‘Install Tonight’ or ‘Remind Me Later’. If you select ‘Install Tonight’, just plug your iPhone into power before you go to sleep, and it will update automatically overnight.
  6. Completing the Installation: Your iPhone will restart during the installation process. Once it’s done, it will boot up to the lock screen. You might need to enter your passcode and complete a few setup steps if prompted.
  7. Check the iOS Version: To ensure the update was successful, go back to ‘Settings’, select ‘General’, and then ‘About’. Here you should see iOS 17.2 listed as the current version.

If you encounter any issues during the installation, you can contact Apple Support for assistance. Also, some updates might not be available for all models or in all regions, so availability could vary.

Advertisement

Grand Theft Auto VI – Sparks Gamers Frenzy

Grand Theft Auto VI – Sparks Gamers Frenzy

Grand Theft Auto VI Trailer 1 – Finally Here

In the expansive realm of gaming, few franchises command the same level of adoration and fervor as the Grand Theft Auto (GTA) series. Its influence over the gaming community is unparalleled, stoking a fervent anticipation for the next chapter in this acclaimed saga. After a prolonged period of speculation and waiting, the moment that gamers across the globe have eagerly awaited has finally arrived. Rockstar Games, the esteemed architects behind the illustrious GTA series, have treated the world to the inaugural official trailer for the much-anticipated Grand Theft Auto VI.

A Decade in the Making

The unveiling of the GTA VI trailer marks an extraordinary milestone in the annals of gaming history. Over ten years have elapsed since the groundbreaking release of Grand Theft Auto V, and throughout this extended period, ardent enthusiasts and industry insiders have been abuzz with conjecture and anticipation, eagerly predicting and yearning for the evolution of this legendary franchise.

The Trailer Number 1: A Glimpse into the Future

Diving into the GTA VI trailer is akin to immersing oneself in an awe-inspiring visual extravaganza. It presents a level of hyper-realism that defies the boundaries of conventional gaming experiences. Despite its unplanned early release due to a leak, the impact it has made within the gaming community is nothing short of astounding. The trailer has garnered unanimous acclaim, eliciting enthusiastic approval and fervent praise from a multitude of fans and discerning critics alike.

A New Narrative Shift: Introducing the First Female Lead Character

A groundbreaking departure within the series, GTA VI introduces its first-ever female lead character. This transformative change promises to inject the game’s narrative with an invigoratingly fresh perspective, heralding an era of unparalleled storytelling depth and emotional resonance. It’s poised to deliver a gaming experience that not only captivates but also transcends the boundaries of traditional gaming tropes.

Release Date and Platforms

Rockstar Games has officially confirmed that GTA VI is slated for release on PlayStation 5 and Xbox Series X/S platforms in 2025. While specific details regarding its availability on other platforms, notably the PC, remain undisclosed, fervent fans remain hopeful for broader accessibility across an array of gaming platforms.

Looking Ahead

The impact of the GTA VI trailer’s unveiling has sent shockwaves pulsating throughout the gaming community. As the highly-anticipated release in 2025 draws nearer, the trailer serves as an enticing peek into what promises to be a groundbreaking addition to the iconic Grand Theft Auto legacy.

Stay Tuned for Comprehensive Coverage

Expect an ongoing stream of updates and in-depth coverage of Grand Theft Auto VI as we embark on this exhilarating journey together. The excitement is palpable, and the countdown to the game’s release is a testament to the fervour and dedication of the gaming community. Happy gaming!

Please note that all information provided is accurate at the time of writing and may evolve with subsequent releases and announcements from Rockstar Games.

How To Unleash Potential of Windows 11 with Atlas OS on Unraid

How To Unleash Potential of Windows 11 with Atlas OS on Unraid

Virtualization technology has revolutionized the way we experience and utilize operating systems, offering unparalleled flexibility and functionality within a single hardware environment. For enthusiasts seeking to explore the latest in operating systems like Windows 11 while harnessing the power and versatility of Unraid, the prospect of running Windows 11 within a virtual machine (VM) presents an enticing opportunity. In this comprehensive guide, we delve into the step-by-step process of installing Windows 11 on an Unraid VM, providing insights, tips, and essential considerations to help you embark on this exciting technological journey.


Step I: Enabling CPU Virtualisation on your Motherboard BIOS

If you have other VMs running on your UNRAID server, you likely already have the CPU virtualisation enabled within your motherboard BIOS settings. In that case, you can completely skip this step.

But if this is your first time or you have recently reset your BIOS settings to default then you need to refer to your motherboard or system manufacturer’s manual and enable the virtualization.

The CPU virtualisation goes by different names, generally Vt-x or Vt-d for Intel Systems and SVM for AMD Systems. Asus has nicely put together a guide for their systems and you can find it here.

Advertisement

Step II: Enabling VM Manager in UNRAID

Login to your Unraid Server using a web browser

obml5MAAAAASUVORK5CYII=

Navigate to “Settings” from the navigation pane and select VM Manager.

B7uhWeduIFZJAAAAAElFTkSuQmCC

If this is your first time and you have not enabled VMs then you can enable the same by selecting “Yes” from the drop-down menu. 

HlY8vim1wpAAAAAASUVORK5CYII=

This step is mandatory for everyone, download the latest Default Windows VirtIO driver ISO by selecting the latest version from the drop-down menu and then clicking download. We will require the the virtIO drivers during and after the installation of Windows 11.

Advertisement

Step III: Downloading Windows 11 ISO

1. Go to https://www.microsoft.com/software-download/windows11 .

2. Scroll down till you reach the section “Download Windows 11 Disk Image (ISO) for x64 devices”. From there select the multi-edition iso from the drop-down menu and then click “Download now” button.

Screenshot 2023 12 04 at 2.27.33 AM

Source: Microsoft

3. Paste the downloaded iso file in the root folder of the “isos” share inside unRAID.

Advertisement

Step IV: Adding Windows 11 VM into Unraid

  1. Navigate to the VMs tab on the Navigation Bar. Once on the VMS page click on “ADD VM”
  2. A new page will open where several icons of different OS’s are listed. Select Windows 11 Icon.NTRVQBVQBVUAVUAVUAVVAFVAFVAFVQBVQBVQBVUAVUAVUAVVAFVAFVAFVQBVQBVQBVUAVUAVUAVVAFVAFVAFVQBVQBVQBVUAVUAVqUAEFoGtQXM1aFVAFVAFVQBVQBVQBVUAVUAVUAVVAFVAFVAFVQBVQBVQBVUAVUAVUAVVAFVAFVAFVQBVQBVQBVUAVUAVUAVVAFVAFVAFVQBVQBapXgf8Hko6gl2daMk8AAAAASUVORK5CYII=
  3. Now we have to configure the VM for the first time use and installation.
  4. In the name field, you can put a custom name of the VM.
  5. In the column “logical CPUs” you should allocate your CPU’s maximum CPU resources. However, initially, it is preferable to allocate 4 Cores which is also the minimum requirement for Windows 11. Anything less and we will face an error during installation.


Windows 11 - The Tech Blog

7. You will observe the virtIO drivers are already selected so you can leave them unchanged.

8. Next under Primary vDisk, we will create a virtual disk where Windows will install its files. Here under “vDisk Size” the default size is of the disk is set to 64GB. Our recommendation is that you keep it at 250 GB. However, you can increase or decrease it according to you needs. 

Screenshot 2023 12 04 at 1.23.40 AM

Further, the vDisk location should preferably be on the fastest drive on your system. By default, it is stored under the “domains” share. If you have an SSD as a cache drive you can turn “domains share” allocation settings to “prefer” or you can select Manual from the drop-down menu and manually locate the location of your vDisk to a share located on your SSD.

9. We can leave all other things to default for initial setup. We will modify them later once we have successfully installed the windows.

Step V: Installing Windows 11

At this stage, we have successfully configured Unraid for installing Windows 11 as a VM and we can finally proceed with the installation by simply clicking the “Create” button. Tip: You may uncheck the box that says “Start VM after creation” as you can manually start the VM later. This can save you from BIOS errors as you have to press a keyboard key as soon as the VM starts to boot into the setup of Windows 11

To avoid any error what we can do is after the VM is created we can go to the VMs tab and then click on the icon of your freshly created Windows 11 VM.  From the dropdown menu select”Start with ( vnc).

Post the initial Unraid splash screen you have to quickly press any key to enter the Windows 11  setup. After you input the setup will load its files and shortly after you will be greeted with the following screen.

Windows 11 Setup

Here what you need to notice is that you have to select Time and Currency format as English(World). By doing so we will have a bloatfree copy of Windows 11 to some extent without tweaking or modding anything. You can set the region and other preferences as per your needs later after the Windows is installed.

Click Next and you will be prompted to enter the Activation Key for your Windows 11. You can also select “I don’t have a product key option” if you plan to activate your copy of Windows later.

Note: Atlas Os only support Windows 11 Pro. Hence, it is recommended to install the Pro version if you plan to install Atlas OS. Also, Atlas OS only supports the activated version of Windows.

Screenshot 2023 12 02 at 12.02.20 AM
Screenshot 2023 12 02 at 12.02.25 AM

Next, accept the terms and conditions and proceed with the installation. 

Screenshot 2023 12 02 at 12.05.02 AM

Now the setup will ask you where you want to install the copy of the windows. But as you will observe no drive appears on the menu. Hence, we need to install the required drivers for our Virtual Disk. 

To do so simply click “Load Drivers” and you will find  Drivers for different versions of Windows. As we are installing Windows 11 we will select the second last option where we can see W11 is mentioned.


Screenshot 2023 12 02 at 12.05.25 AM

Click Next, and now you must be able to see a drive appears for the installation of Windows. Select that drive and click next to proceed with the installation.

Screenshot 2023 12 02 at 12.05.41 AM

Windows setup will take some time depending on your drive to install the version of Windows you have selected and shall automatically reboot. However, in case you face a black screen you can simply force stop the VM from the Unraid VMs Page and then manually start the VM.

Screenshot 2023 12 02 at 12.10.01 AM

After the successful initial boot of your VM you will come across the following screen:

Screenshot 2023 12 02 at 12.16.00 AM

Here nothing is wrong with this prompt simply click skip as this has happened due to our selection of English (World) as our Region. This will provide you with more benefit than harm. On the next screen, you can select your keyboard layout and then click yes and skip adding another keyboard layout.

Screenshot 2023 12 02 at 12.21.19 AM

Now Windows will try to connect to the internet and will not allow you to proceed without an active connection .

Now to bypass the connection requirement we have to press Shift+F10 which will launch a command prompt.

In the Command Prompt, we have to type the following command:

oobe\BypassNRO

After pressing enter your windows will restart. Now you must once again go through a few steps we completed earlier till you reach “Let’s connect you to a network” page once again but this time you will notice an option on the left side of the out greyed out Next button saying I don’t have internet. Click that and on the next screen click “Continue with limited setup”.

Screenshot 2023 12 02 at 12.21.37 AM
Screenshot 2023 12 02 at 12.21.44 AM

This way you can set up an offline account in Windows 11. Next windows will prompt you to set the username and password of your choice. Set one of your choice and you are almost done with the setup process with just one more step to go.

Screenshot 2023 12 02 at 12.23.07 AM
Screenshot 2023 12 02 at 12.23.16 AM

During this last step, you will be prompted to choose your privacy settings. During our installation, we turned them all off. You may choose what suits you best and click “Accept”.

Screenshot 2023 12 02 at 12.24.05 AM

Now Windows setup will take a while to set your preference and after that you will be greeted with Windows 11 Desktop for the first time.

Screenshot 2023 12 02 at 12.24.20 AM
Screenshot 2023 12 02 at 12.27.04 AM

Now first and the foremost thing to do is to install the virtual drivers for your freshly installed copy of Windows. So head over to the file explorer by pressing Windows+E and navigate to “This PC” using the navigation pane on the left side.

Open the contents of the CD drive, double-click the file “virtio-win-guest-tools.exe” and follow on-screen instructions to install all the necessary drivers on your Windows Virtual Machine.

Screenshot 2023 12 06 at 8.50.27 PM

At this stage, it is best to activate your copy of Windows if you haven’t done so already and personalize your Windows according to your Regional Preferences.

Voila, you have successfully installed a fresh copy of Windows 11 on your Unraid Server. Under the Next step, we will be optimising it further to run more efficiently using Atlas OS.


Step VI: Installing Atlas OS

Now we will be supercharging our Windows 11 VM with the installation of Atlas OS mod which will significantly reduce the amount of resources used by Windows OS and make them available for other tasks like gaming. You can read more about Atlas OS on their official website.

Let’s start by downloading the required files from the official website of the Atlas OS. Once Downloaded Extract the files onto the Desktop in a folder.

Screenshot 2023 12 02 at 12.47.10 AM

From the extracted files launch the AME Wizard Beta.exe file and from the other extracted folder drag and drop the atlasplaybook_xxxx.apbx file to the top left corner of the AME Wizard.

Screenshot 2023 12 02 at 12.49.51 AM
Now the wizard will ask you to disable Windows Defender for the sake of installation. Here you can simply click the Run Action Button and it will take you to the Defender Settings. Slide all four toggles to the off position and return to AME Wizard.
Screenshot 2023 12 02 at 12.50.23 AM
Screenshot 2023 12 02 at 12.50.35 AM

AME Wizard will verify the settings and once verified you can proceed with the installation by pressing next and you will be prompted with the following screen:

Screenshot 2023 12 02 at 12.58.36 AM

At this stage, if your copy of Windows 11 is not activated the setup wizard will not allow you to proceed further. Otherwise, we can simply click next and accept the license agreement.

On the next screen, you will be prompted to select the configuration options before proceeding. You can use the recommended settings and choose your preferred internet browser.

Finally, Click Next to let the wizard start the installation of Atlas OS.

Screenshot 2023 12 02 at 1.01.16 AM

After successful installation, the OS will restart, and you will have a bloat-free version of Windows 11 optimized for performance. Just to give you a perspective below are the screenshots of the threads and processes utilization at the ideal state on stock windows and then on with Atlas OS customization.


Step VII: Passing through GPU and Reallocating Resources

To configure our VM further, we need to shut down Windows 11 from the start menu. Once the VM is completely stopped we can edit it by clicking on its icon on VMs page of our Unraid Server.

Here we can increase the CPU and Ram Allocation to our Virtual Machine. Previously, we had allocated 6 cores 12 threads and 4 GB of Ram to our Windows 11 VM now we have increased it to 8 Cores 16 Threads and 16 Gb of RAM.  


Windows 11 VM Unraid

To passthrough GPU, scroll down to the Graphics Card menu and click the small green coloured plus icon on the right side to add a second GPU apart from a virtual GPU. 

From the drop-down list select your GPU and just below that select the same GPU as Sound Card as well.

GPU Passthrough Windows VM Unraid

At the bottom of the page, you also have the option to passthrough your other peripherals you can check mark one you want to passthrough like your wifi card and click on update.

Now before firing up your VM, we need to complete one last step. Head over to the tools page and select “System Devices”

Unraid System Devices

On the tools page, you will find different IOMMU groups. The one which we are concerned about states “VGA compatible controller”. Find that and select all devices in that group.

Lastly, click Bind Selected To VFIO at Boot and reboot your Unraid Server.

Screenshot 2023 12 06 at 11.34.45 PM

Now after your Unraid Server is back up, you can start your Windows 11 VM and install the necessary Drivers for your GPU from your manufacturer’s website. We also recommend you use Parsec or some other remote desktop software as they can offer better picture quality, and low latency and can be accessed from anywhere.

We benched our Virtual Machine using Cinebench R23 and here is the result:


Cinebench R23 Windows 11 VM

Our Virtual Machine System Configuration is as follows:

CPU : AMD Ryzen 3900X, 8 Cores 16 Threads (Allocated)

Ram: 16 GB, G.Skill Ripjaws V 2400 MHz (Allocated)

GPU: Asus TUF Nvidia GTX 1660

 With this, we leave you to enjoy and explore your new Virtual Machine on your Unraid Server. If you liked our guide or have any queries/suggestions let us know in the comment section down below.

Samsung One UI 6: The Latest Android 14 Update reaches India

Samsung One UI 6: The Latest Android 14 Update reaches India

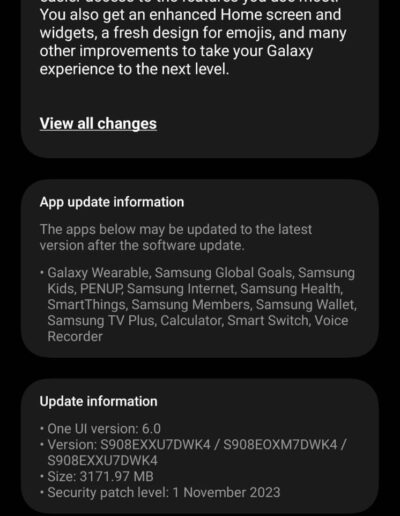
Samsung enthusiasts and Galaxy S22 Series owners, rejoice! The tech giant has commenced the rollout of its highly-anticipated One UI 6 (based on latest Android 14) update for S22 series users in India. This latest software update promises to elevate your smartphone experience, bringing a plethora of new features, enhancements, and optimizations to the acclaimed Galaxy S22 lineup.

The substantial update size of 3171.97 MB indicates the comprehensive nature of the One UI 6 update, incorporating various improvements and new features to elevate the user experience on the Galaxy Series Handsets. Few notable improvements are as follows:

Quick Panel 

New button layout

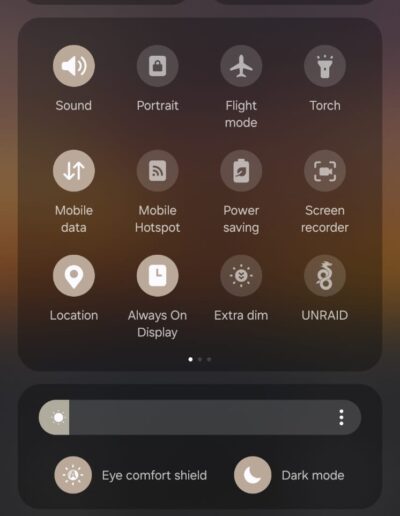
The quick panel has a new layout that makes it easier to access the features you use most. Wi-Fi and Bluetooth now have their own dedicated buttons at the top of the screen, while visual features like Dark mode and Eye comfort shield have been moved to the bottom. Other quick settings buttons appear in a customizable area in the middle.


Instantly access the full quick panel

By default, a compact quick panel with notifications appears when you swipe down from the top of the screen. Swiping down again hides notifications and shows the expanded quick panel. If you turn on Quick settings instant access, you can view the expanded quick panel by swiping just once from the right side of the top of the screen. Swiping down from the left side shows notifications.


Quickly access brightness control

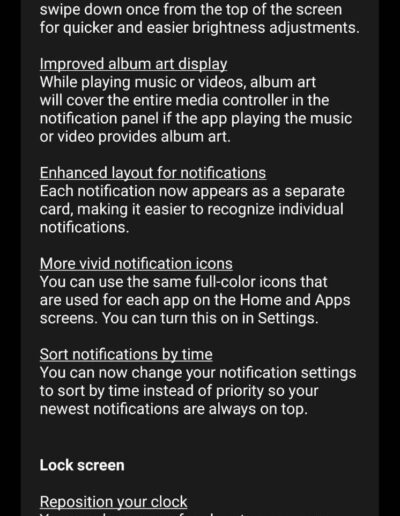
The brightness control bar now appears by default in the compact quick panel when you swipe down once from the top of the screen for quicker and easier brightness adjustments.


Improved album art display

While playing music or videos, album art will cover the entire media controller in the notification panel if the app playing the music or video provides album art.


Enhanced layout for notifications

Each notification now appears as a separate card, making it easier to recognize individual notifications.


More vivid notification icons

You can use the same full-color icons that are used for each app on the Home and Apps screens. You can turn this on in Settings.


Sort notifications by time

You can now change your notification settings to sort by time instead of priority so your newest notifications are always on top.


Lock screen

Clock repositioning

You now have more freedom to move your clock to the position of your choice on the Lock screen.


Home screen

Simplified icon labels

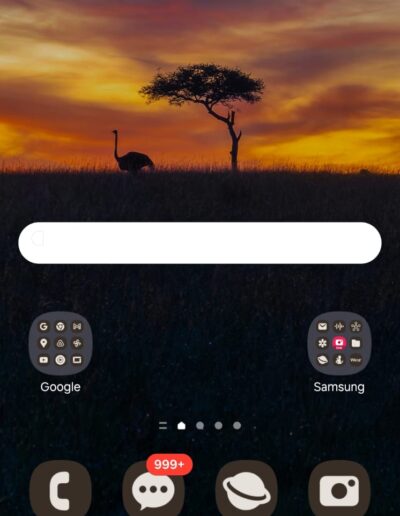
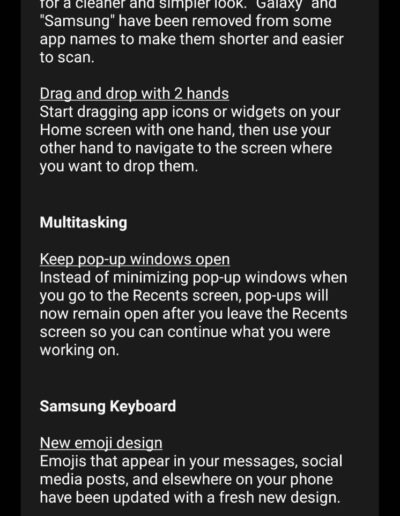
App icon labels are now limited to a single line for a cleaner and simpler look. “Galaxy” and “Samsung” have been removed from some app names to make them shorter and easier to scan.


Drag and drop with 2 hands

Start dragging app icons or widgets on your Home screen with one hand, then use your other hand to navigate to the screen where you want to drop them.


Multitasking


Keep pop-up windows open  

Instead of minimizing pop-up windows when you go to the Recents screen, pop-ups will now remain open after you leave the Recents screen so you can continue what you were working on.


Samsung DeX


Meet the new DeX for tablets

The new Samsung DeX lets you switch between DeX mode and tablet mode with the same Home screen layout. All of your usual apps, widgets and icons are available in DeX. You can also use DeX in both landscape and portrait orientations if Auto rotate is turned on for your tablet.1

Link to Windows

Now available on tablets

Connect your tablet to your Windows PC to check notifications and use apps from your tablet on your PC, transfer files between your devices and more.

Samsung Keyboard 

New emoji design

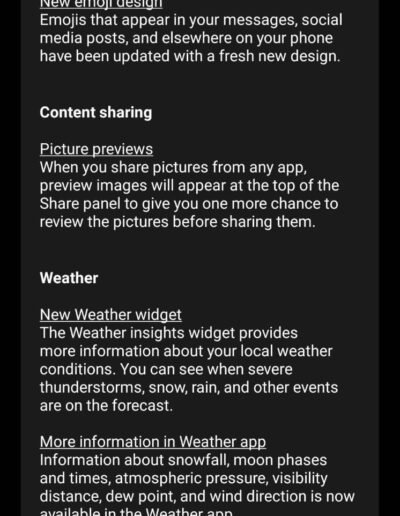
Emojis that appear in your messages, social media posts and elsewhere on your phone have been updated with a fresh new design.

Content sharing

Picture previews

When you share pictures from any app, preview images will appear at the top of the Share panel to give you one more chance to review before sharing.


Camera

Simple and intuitive design

The overall layout of the Camera app has been simplified. Quick settings buttons on the preview screen have been redesigned to be simpler and more intuitive.


Camera widgets customisation

You can add custom camera widgets to your Home screen. You can set each widget to start in a specific shooting mode and save pictures in an album of your choice.


More alignment options for watermarks

You can now choose whether your watermark appears at the top or bottom of your photos.


Quick access to resolution settings

A resolution button is now available in the quick settings at the top of the screen in Photo and Pro modes so you can quickly change the resolution of photos you take.


Enhanced video size selection

A pop-up now appears when you tap the video size button, making it easier to see all the options and choose the right ones.


Keep your pictures level

When grid lines are turned on in Camera settings, a level line will now appear in the middle of the screen while using the rear camera in all modes except Panorama. The line will move to show whether your picture is level with the ground.


Quality optimization

You can choose between 3 levels of quality optimization for the pictures you take. Choose Maximum to get the highest quality pictures. Choose Minimum to take pictures as quickly as possible. You can also choose Medium to get the best balance of speed and quality.


New Auto FPS options for videos 

Auto FPS can help you record brighter videos in low-light conditions. Auto FPS now has 3 options. You can turn it off, use it for 30 fps videos only or use it for both 30 fps and 60 fps videos.


Apply effects more easily

Filter and face effects now use a dial instead of a slider, making it easier to make precise adjustments with just one hand.


Turn off swipe up/down to switch cameras

Swiping up or down to switch between the front and rear cameras is now optional. If you’re concerned about accidental swipes, you can turn this off in Settings.


Easier document scanning 

The Scan document feature has been separated from Scene optimizer so you can scan documents even if Scene optimizer is turned off. The new Auto scan lets you scan documents automatically whenever you take a picture of a document. After a document is scanned, you’ll be taken to the edit screen where you can rotate your document to align it the way you want.


Quick edits in detail view

While viewing a picture or video, swipe up from the bottom of the screen to go to detail view. This screen now provides quick access to effects and editing features you can immediately apply.


Drag and drop with 2 hands 

Touch and hold pictures and videos with one hand, then use your other hand to navigate to the album where you want to drop them.


Save clipped images as stickers

When you clip something from an image, you can easily save it as a sticker that you can use later when editing pictures or videos.


Enhanced story view

While viewing a story, a thumbnail view appears when you swipe up from the bottom of the screen. In thumbnail view, you can add or remove pictures and videos from your story.

Photo Editor


Enhanced layout  

The new Tools menu makes it easier to find the editing features you need. Straighten and Perspective options have been combined in the Transform menu.

Adjust decorations after saving

You can now make changes to drawings, stickers and text that you’ve added to a photo even after saving.

Undo and redo

Don’t worry about making mistakes. You can now easily undo or redo transformations, filters and tones.

Draw on custom stickers

When creating custom stickers, you can now use the drawing tools to make your stickers even more personal and unique. 

New text backgrounds and styles  

When adding text to a photo, you can choose from several new backgrounds and styles to help you get the perfect look.

Source: Samsung’s official Website 

For a detailed overview of the features and enhancements introduced with One UI 6, you can visit Samsung’s official One UI 6 features page.

How to Update to One UI 6

If you’re a Galaxy S22 series owner in India eager to experience the latest One UI 6 update, here’s how you can check for the update:

  1. Settings: Navigate to the “Settings” app on your device.
  2. Software Update: Scroll down and tap on “Software Update.”
  3. Download and Install: If the One UI 6 update is available for your device, follow the on-screen instructions to download and install the update.

Final Thoughts

Samsung’s commitment to delivering timely software updates underscores its dedication to providing users with an enhanced and optimized smartphone experience. The One UI 6 update for the Galaxy S22 series in India signifies the brand’s efforts in catering to user feedback and continuously improving its devices in Indian market.

This time around the overall update experience has been smooth till now with no app crashes and a responsive UI. This is an appreciable effort from Samsung as S22 series is now receiving it’s second major OS update. This is contrary to the history of android phones from just few years back.

However, if you still are sceptical about bugs and want a totally stable experience you may wait a little longer before installing the latest update. For all others, prepare to explore the new and improved features that One UI 6 brings to your Galaxy device. Embrace a more refined, efficient, and personalized smartphone experience with Samsung’s latest software update.

If you haven’t received the One UI 6 update notification yet, don’t fret. Samsung typically rolls out updates in phases, ensuring a smooth and stable deployment for all users.

Disclaimer: The rollout of software updates may vary by region and carrier. Make sure to back up your device before initiating the update process.


This blog post aims to inform readers about the rollout of Samsung’s One UI 6 update for the Galaxy S22 series in India while highlighting the key features and improvements users can expect from the update.

Ignite Unraid Torrenting Potential with Deluge VPN: Setup in 10 Minutes!

Ignite Unraid Torrenting Potential with Deluge VPN: Setup in 10 Minutes!

Advertisement

“Here’s a step-by-step guide on how to setup Nord VPN or Express VPN with deluge docker inside the Unraid. This guide focuses setting up Express VPN or Nord VPN with Deluge Docker on Unraid by configuring the VPN settings within the Docker container for Deluge rather than setting up a different container and routing traffic through that container.

Step I: Downloading the OVPN Configuration files from the respective VPN provider (Nord/Express VPN)

1. For Nord VPN simply go to https://nordvpn.com/ovpn/ alternatively in the case of Express VPN first login to your account then click on “More” under the “Set up your devices” section.

Then select “Manual Configuration”.


wEU+4dhNSPqAQAAAABJRU5ErkJggg==


2. From the list select the country/region of your choice and download the configuration file. You can download and save either a TCP or UDP file. Generally, a UDP protocol file is recommended. For more information regarding which protocol to choose you can refer to https://nordvpn.com/blog/tcp-or-udp-which-is-better/

Step II: Finding Username and Password for your Nord / Express VPN Configuration File.

1. In case of Express VPN you can easily find the username and password at the same page you downloaded the configuration files from as it is written just above that.

S7EAAAAASUVORK5CYII=

OR

    In case of Nord VPN, login to your account then click on the Nord VPN on the left and then on “Setup NordVPN manually”.


1

Source: NordVPN

Then NordVPN will ask for an email verification. Here, enter the code received on your registered email ID. Finally, you can access your credentials on the next screen.

3

Source: NordVPN

2. Copy and paste the username and password on a notepad as we will require it while configuring the docker container.

 Step III: Installation of Deluge Docker Container in Unraid.

1. Access the Community Applications plugin in your Unraid dashboard.

2. Search for “DelugeVPN” and install the Deluge Docker container by Binhex.

2GAAAAAElFTkSuQmCC

3. Once installed, access the Deluge docker container settings and scroll down till you come across KEY 1, KEY 2 & KEY 3.

4. From the drop down menu in Key 1 select yes to activate VPN.

5. In the field Key 2 and Key 3 paste your username and password respectively that we copied under Step II.

AUHfVkvXY63uAAAAAElFTkSuQmCC

6. Scroll down to the bottom and click Apply.

Step IV: Copying OVPN Config File to Deluge VPN Folder.

1. Before Proceeding go to the Docker Tab and stop your Dluge Docker Container by right clicking on the icon and then selecting stop.

2. Now go to your Shares Tab and you click on share named “appdata”.

3. If you have not shared this previously then click on “export” and set the security to “public” under SMB security settings. Hit Apply to commit changes.

4. Now you will be able to access this network share. Open the share on your PC or Mac and open the binhex-delugevpn folder.

5. Here you will find a folder named “openvpn”. Open the folder and paste the OVPN configuration file obtained under Step I .

H247+7n6Lv9Ur5TBrz7ZPtuJ0YwoCCCCAAAIIIIAAAggggAACCCCAAAIIIIAAAggggAACCCCAAAIIIIAAAggggAACCCCAAAIIIIAAAggggAACCCCAAAIIIIAAAggggAACCCCAAAIIIIAAAggggAACCCCAAAIIIIAAAggggAACCCCAAAIIIIAAAggggAACCCCAAAIIIIAAAggggAACCCCAAAIIIIAAAggggAACCCCAAAIIIIAAAggggAACCCCAAAIIIIAAAggggAACCCCAAAIIIIAAAggggAACCCCAAAIIIIAAAggggAACCCCAAAIIIIAAAggggAACCCCAAAIIIIAAAggggAACCCCAAAIIIIAAAggggAACCCCAAAIIIIAAAggggAACCCCAAAIIIIAAAggggAACCCCAAAIIIIAAAggggAACCCCAAAIIIIAAAggggAACCCCAAAIIIIAAAggggAACCCCAAAIIIIAAAggggAACCCCAAAIIIIAAAggggAACCCCAAAIIIIAAAggggAACCCCAAAIIIIAAAggggAACCCCAAAIIIIAAAn8RgX8AqLeOPCUgWrQAAAAASUVORK5CYII=

6. Close the folder and revert back the “appdata” Share settings by selecting export as no and security as private.

Step V: Final Step

1. Go to your Docker Tab and right click on Deluge Icon and hit Start.

2. Once the Docker is started again right click on the icon and hit webui to access the GUI.

3.Here you will be prompted to enter the password, the default password is “deluge”.

4. Now at the bottom right you will observe that IP Address is mentioned.

QiEHdjjmRPsAAAAASUVORK5CYII=

5. You can crosscheck whether you are connected with VPN by entering that IP address on sites like https://www.iplocation.net/ . At this stage the location/region should match the location /region you selected while downloading your OVPN Configuration file under Step I.

Congrats! you can now start downloading Torrents without exposing your IP Address.

Note: Remember to use torrents responsibly and ensure you have the right to download and share any content you obtain via torrents, as unauthorized downloading could violate copyright laws in some regions.


Pin It on Pinterest